Create a new version
For version 16.5 Update 17 and later: Security permissions can be applied to global Price Decks individually. This means that users must be granted 'Read' permission for a price deck in order to be able to select that deck for a version. See Permissions for price decks and price groups.
To create a new version and configure its permissions:
- Click the Manager button
 in the Versions tab on the ribbon. The Versions screen will be opened.
 - Click the New button
 in the Version Manager tab on the ribbon. The New Version dialog will open.
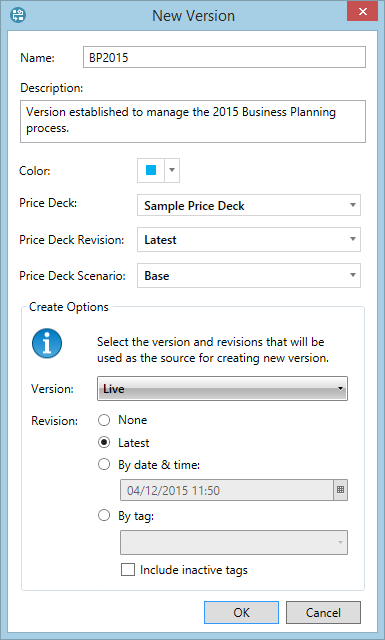
 - Enter a name and description for the new version. In the Color field, select which color will represent the version on document tabs and in the hierarchy.
- Select the version which will be used as the source of documents.
- Select which revision of documents in the original version should be copied into the new version.
- Click OK. The progress and results of the create operation will be shown in the task notification area. If the operation finishes successfully, the new version will appear in the list on the Versions screen.
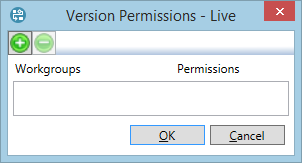
- Now you need to specify access permissions for the new version. Click the Permissions button
 in the Version Manager tab on the ribbon and the Version Permissions dialog will be displayed.
 - Click the 'plus'
 button
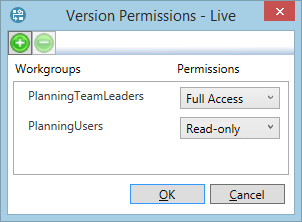
to open the list of workgroups. Select one or several workgroups using the checkboxes, specify their access rights and click OK.
To remove a workgroup, select it and click the minus
  button. The permissions are described in the table below.
 - Click OK to save the changes. The version is now ready for use.

| Option | Description |
|---|---|
| None | The new version will not have any documents included and will only contain the root node. You can copy documents from the Live version later or create them by other means. |
| Latest | Documents in the new version will be created using the Latest revision. |
| By date and time | Documents in the new version will be created using only revisions that have the specified date and time (e.g. documents which have revisions for 02/05/2018). If a document has no revision at that date, it will be not copied into the new version. |
| By tag | Documents in the new version will be created from revisions which are tagged with the specified tag. |
| Price Deck | Specifies the price deck that the version will use (see Prices). |
| Price Deck Revision | Specifies the revision of the selected price deck that the version will use. |
| Price Deck Scenario | Specifies the scenario of the selected price deck that the version will use. |
Note: If you are using the By date and time or By tag options and some documents in the source version do not meet the selected criteria, they will not be copied. If nodes underneath them are copied successfully, the missing nodes will be grayed out and will not be openable.


| Permission | Description |
|---|---|
| Denied | The workgroup will not be able to see or open the version. |
| Read-only | The workgroup will be able to see and open that version but will not be able to delete it, update it, and assign permissions to it. |
| Full Access | The workgroup will be able to see the version, open it and edit it according to the workgroup's permissions for node types and individual documents, delete it, and change its permissions. |
For version 16.5 Update 17 and later: In earlier versions users with 'Read-only' permission for a version were allowed to add or remove revision tags to a document within the version. The permission level has increased to 'Full Access' permission to be required to modify revision tags.
